Blog
Lash Lift Photoshoots: How to Capture the Perfect After Shot
The salon
Schedule
| Lundi | 8:00 – 21:00 |
| Mardi | 8:00 – 21:00 |
| Mercredi | 8:00 – 21:00 |
| Jeudi | 8:00 – 21:00 |
| Vendredi | 8:00 – 21:00 |
| Samedi | 8:00 – 21:00 |
| Dimanche | 8:00 – 21:00 |
Schedule
| Lundi | 8:00 – 21:00 |
| Mardi | 8:00 – 21:00 |
| Mercredi | 8:00 – 21:00 |
| Jeudi | 8:00 – 21:00 |
| Vendredi | 8:00 – 21:00 |
| Samedi | 8:00 – 21:00 |
| Dimanche | 8:00 – 21:00 |
Voir calendrier
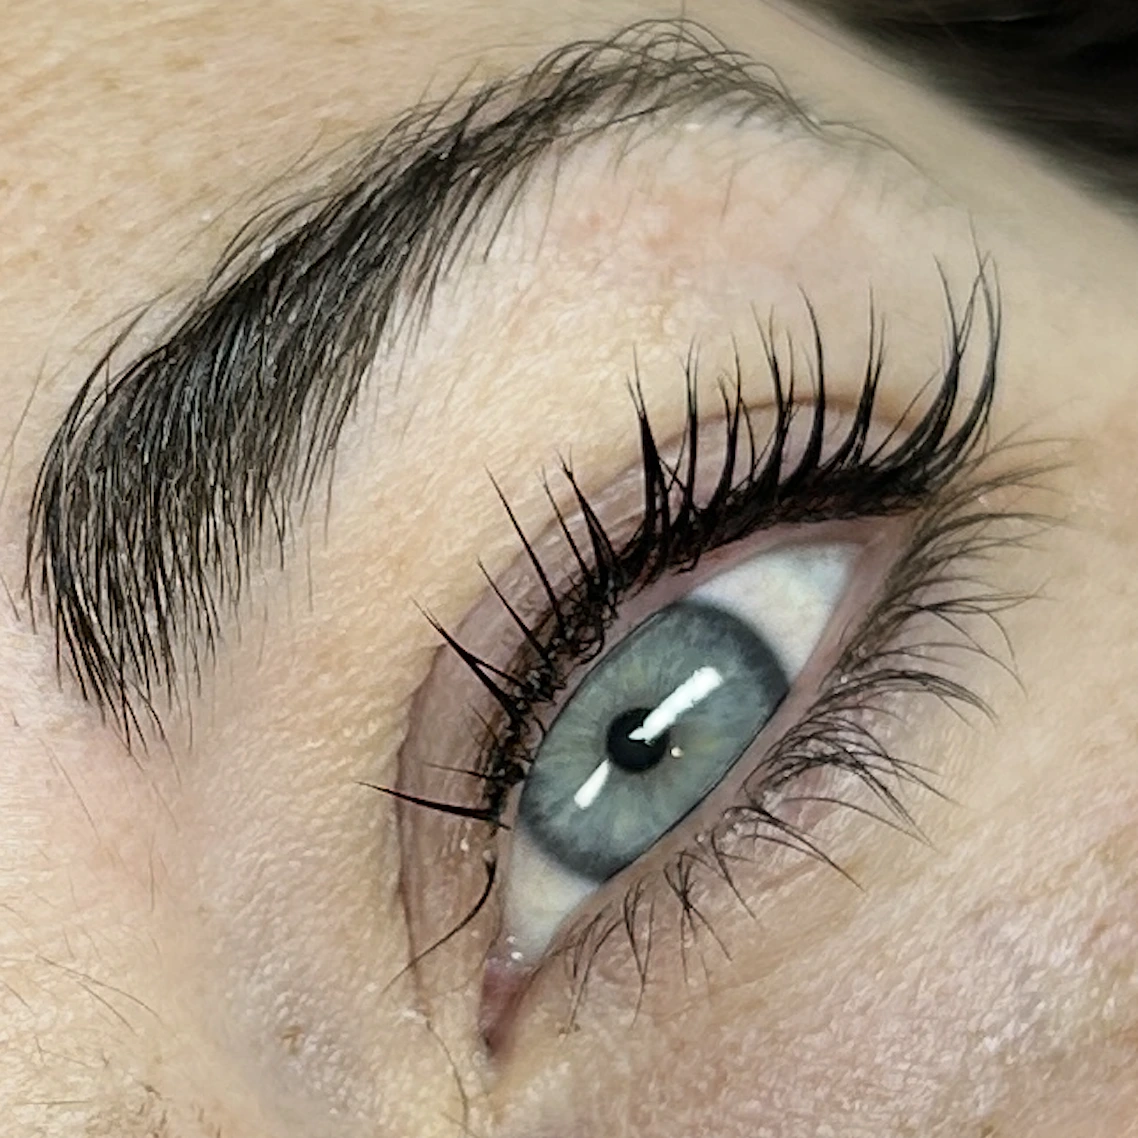
Capturing the ultimate after shot of a lash lift is an art. It's about showcasing the transformation and beauty of your client’s lashes. In this guide, we will dive into the essentials of lash lift photography to help you capture stunning results every time. Let’s explore the key aspects of setting up your photoshoot, capturing flawless images, and editing them to create a captivating portfolio.
Understanding Lash Lift Photography Essentials
When capturing the beauty of a lash lift, knowledge of photography essentials is crucial. Start by selecting the right camera. A DSLR or mirrorless camera is a great choice for high-quality images. Phone cameras can also suffice if they are equipped with advanced settings.
Lighting is a cornerstone of lash lift photography. Soft natural light works wonders, but if that’s not available, consider a ring light or softbox to minimize shadows and highlight details. When choosing lighting equipment, ensure that it provides even and consistent light.
Understanding how to frame and focus your shots is equally important. A good close-up shot of the lashes can capture the intricate details. Use the macro setting on your camera for detailed shots. Practice these fundamental lash lift photography tips and you will create compelling, eye-catching images.
When capturing the beauty of a lash lift, knowledge of photography essentials is crucial
Setting Up Your Photoshoot Environment
Creating an ideal photoshoot setup for lash lifts involves careful consideration of your environment. A clean and uncluttered background keeps the focus on the subject—it’s about the lashes, after all. A plain wall or a simple backdrop works well.
Proper lighting placement can transform your photos. Position your lights in a way that they illuminate the face evenly. A diffused light source can reduce harsh shadows. If using natural light, position your client near a window.
Adding props can enhance the optimal environment for beauty photography. Consider soft drapes or textured fabrics to add depth but ensure they don’t distract from the main focus—the client’s eyes and lashes.
Techniques for Capturing Flawless Lash Lift Results
To truly capture the magic of a lash lift, focus on key techniques. Start by exploring different angles. A side profile can highlight the curl, while a frontal shot showcases the length.
Optimize your camera’s focus settings. Use manual focus for precision and adjust the aperture to ensure both eyes are in perfect clarity. Stand at different distances to see which captures the lashes best.
Including a how to photograph lash lifts tutorial can streamline your process. Begin by directing your client to look slightly upwards or downwards, experimenting until the lashes are perfectly visible. Move your light source if shadows disrupt the balance.
Editing Tips for Striking Lash Lift Images
Sometimes, a little post-production can elevate your shot from good to stunning. Choose software like Photoshop or Lightroom, both excellent for editing lash lift photos.
Begin by adjusting the brightness and contrast to bring out the lashes. Avoid over-editing; the goal is to enhance, not alter. Use the clarity tool to sharpen the lashes’ edge without making them look harsh.
Here's a step-by-step on enhancing beauty photography:
- Open your image in editing software.
- Adjust exposure for balanced light.
- Use the brush tool for selective sharpness on the lashes.
- Tweak saturation levels to maintain skin tone authenticity.
- Save and export in high resolution.
Showcasing Your Work: Building an Impressive Portfolio
Creating a lash lift photography portfolio involves selecting images that clearly demonstrate your talent in capturing lash lifts. Choose varied shots that show different lash styles and techniques you’ve mastered.
Build an online presence to share your work. Use social media platforms like Instagram and Pinterest, where visual content thrives. Construct a professional website where clients can easily view your portfolio.
To truly share beauty photography online, engage with communities, participate in forums, and showcase your work in online galleries specifically for photographers.
Well-crafted images and strategic sharing will expand your reach and attract new clients to your lash lift services in Montreal.
Get started with these tips, and soon your photos will not only enhance your portfolio but also highlight the stunning transformations achieved through lash lifts,
Don't forget to follow @meyinabeauty on Instagram for tips, inspiration and exclusive offers and to visit our Google profile to keep up to date with our latest news! Also, check out our lash lift service page in Montreal to achieve a more intense look!
Keywords: Lash lift photography, Montreal lash lift photoshoot, capturing lash lifts, lash lift photography techniques, editing beauty photos, lash transformations, building a portfolio, sharing beauty online, high-quality beauty photography, Montreal beauty photography tips.