Blog
Step-by-Step Guide to Eyelash Extension Application
The salon
Schedule
| Lundi | 8:00 – 21:00 |
| Mardi | 8:00 – 21:00 |
| Mercredi | 8:00 – 21:00 |
| Jeudi | 8:00 – 21:00 |
| Vendredi | 8:00 – 21:00 |
| Samedi | 8:00 – 21:00 |
| Dimanche | 8:00 – 21:00 |
Schedule
| Lundi | 8:00 – 21:00 |
| Mardi | 8:00 – 21:00 |
| Mercredi | 8:00 – 21:00 |
| Jeudi | 8:00 – 21:00 |
| Vendredi | 8:00 – 21:00 |
| Samedi | 8:00 – 21:00 |
| Dimanche | 8:00 – 21:00 |
Voir calendrier
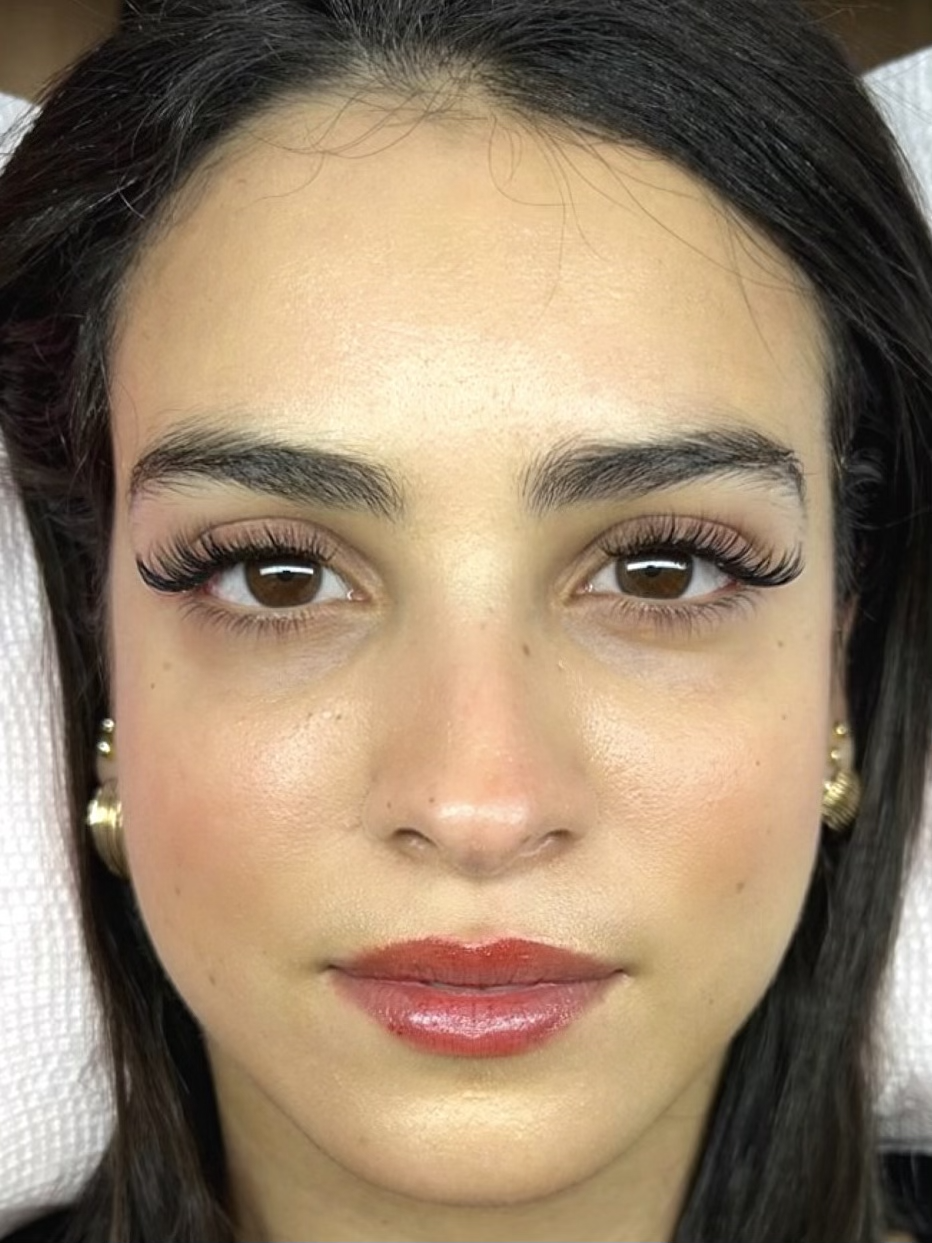
Eyelash extensions are a popular beauty enhancement, offering longer, fuller lashes without the need for daily mascara. Proper application is essential for achieving natural-looking, long-lasting results. In this guide, we’ll walk through the entire process, from preparing your workspace to the final aftercare recommendations.
Tools and Materials Needed for Eyelash Extension Application
Having the right tools and materials is the foundation of a successful eyelash extension application. High-quality products ensure the safety, comfort, and longevity of the extensions. Here’s what you’ll need:
- Tweezers: A pair of fine-pointed isolation tweezers and application tweezers to precisely pick up and place extensions.
- Lash Adhesive: A professional-grade, fast-drying adhesive that’s safe for sensitive eyes.
- Lash Extensions: Choose from classic, volume, or hybrid lash extensions depending on the desired look and your client’s natural lashes.
- Primer: An oil-free primer to cleanse and prep the client’s lashes, ensuring better adhesion.
- Spoolie Brush: Used to comb through the lashes before and after application to prevent tangling and ensure alignment.
- Eye Pads or Tape: To protect the lower lashes and provide a clear view of the upper lashes during application.
- Nano Mister or Fan: To help cure the adhesive faster and reduce fumes.
- Adhesive Remover: In case of any mishaps or if removal is needed.
Using high-quality tools and materials not only makes the process smoother but also ensures better results and client satisfaction.
Preparing the Client and Workstation
Preparation is key to a successful lash application. Setting up your workstation and properly prepping the client’s lashes ensures the best outcome and reduces the risk of irritation or premature lash loss.
Client Preparation:
- Clean the client’s lashes using an oil-free cleanser or lash primer to remove any makeup, dirt, or oils that can interfere with the adhesive.
- Place eye pads or use medical tape under the client’s eyes to secure the lower lashes and prevent them from sticking to the upper lashes during the procedure.
Workstation Preparation:
- Ensure your workstation is well-organized with all tools within easy reach.
- Use proper lighting to clearly see the client’s natural lashes. A magnifying lamp or LED lash lamp works well for precision.
- Make sure your area is sanitized and ready to go to avoid contamination.
By taking the time to prepare both your client and workstation, you’re setting yourself up for a smoother, more efficient lash application.
Isolating Natural Lashes
Isolation is one of the most critical steps in eyelash extension application. Isolating each natural lash ensures that the extensions adhere correctly, preventing clumping or sticking multiple lashes together.
How to Isolate Lashes:
- Use fine-pointed isolation tweezers to separate a single natural lash. Isolating each lash ensures that only one extension is attached to one natural lash.
- Avoid placing the extension too close to the surrounding lashes, as this can cause clumping or irritation.
- Take your time during this step. Proper isolation is key to a natural-looking result and long-lasting retention.
Poor isolation can lead to discomfort for the client and may cause premature lash loss, so it's important to master this technique.
Applying the Eyelash Extensions
The application process requires precision and care to achieve the best results. Here’s how to apply the extensions step-by-step.
Step-by-Step Application:
Pick Up the Lash Extension: Using your tweezers, pick up a lash extension by the tapered end. Be gentle to avoid damaging the extension. Dip in Adhesive: Dip the base of the extension into the adhesive. Use only a small amount of glue—just enough to cover the base. Too much adhesive can cause clumping. Place the Extension: Carefully place the extension 1-2mm from the eyelid along the natural lash, ensuring it sits straight and at the correct angle. The extension should not touch the skin, as this can lead to discomfort or irritation. Repeat for Each Lash: Continue the process, working from the outer corner inward. Make sure each extension is properly isolated and applied to a single lash.Tips for Success:
- Work in small sections to avoid overwhelming yourself.
- Allow the glue to dry before moving to the next lash to prevent sticking.
- Avoid applying too much adhesive to reduce clumping and ensure the lashes look natural.
Curing and Drying the Extensions
After applying the lash extensions, it’s important to let the adhesive cure and dry properly. This ensures the extensions are securely attached and reduces the risk of irritation.
Curing the Adhesive:
- Use a nano mister or small fan to gently cure the adhesive. The mist helps speed up the drying process and reduces any potential irritation caused by the adhesive fumes.
- Allow the lashes to dry for a few minutes before touching them or exposing them to air.
Remind your client to avoid water and steam for the first 24 hours after the application, as moisture can weaken the adhesive before it has fully cured.
Post-Application Care
Once all the extensions are applied, it’s important to check the lashes for any errors and make sure they are properly aligned.
Final Steps:
- Use a spoolie brush to gently comb through the lashes, ensuring they are properly aligned and that no two lashes are stuck together.
- Perform a final check for any misplaced lashes and correct any extensions that may have shifted during the application.
This final step ensures that the lashes are perfectly positioned and ready for the client to show off.
Aftercare Recommendations
Proper aftercare is essential to maintaining lash extensions and prolonging their life. Educating your client on how to care for their extensions will help prevent premature lash loss.
Aftercare Tips for Clients:
- Avoid oil-based products: Oil can weaken the adhesive, so clients should avoid oil-based makeup removers and skincare products near the lashes.
- Keep lashes clean: Use a gentle, lash-safe cleanser to clean the lashes regularly, removing dirt, oil, and makeup residue.
- Brush daily: Advise clients to gently brush their lashes daily using a clean spoolie to prevent tangling and keep them looking neat.
- No excessive touching: Clients should avoid rubbing, pulling, or touching their lashes to prevent premature fallout.
- Schedule touch-ups: Recommend touch-ups every 2-3 weeks to replace extensions that have shed naturally with the lash growth cycle.
Following these aftercare tips will help clients enjoy their beautiful extensions for as long as possible.
Having the right tools and materials is the foundation of a successful eyelash extension application
Conclusion
Applying eyelash extensions requires precision, patience, and practice, but the results are well worth the effort. By following the steps outlined in this guide—preparing your tools, isolating lashes, applying extensions carefully, and ensuring proper aftercare—you can achieve stunning, long-lasting results for your clients.
Don't forget to follow @meyinabeauty on Instagram for tips, inspiration and exclusive offers and to visit our Google profile to keep up to date with our latest news! Also, check out our eyelash extension service page in Montreal to achieve a more intense look!
Keywords: eyelash extension application, lash extension tools, lash extension technique, how to apply lash extensions, eyelash extension aftercare, lash isolation technique.